


 12:55 am
 Balakumar

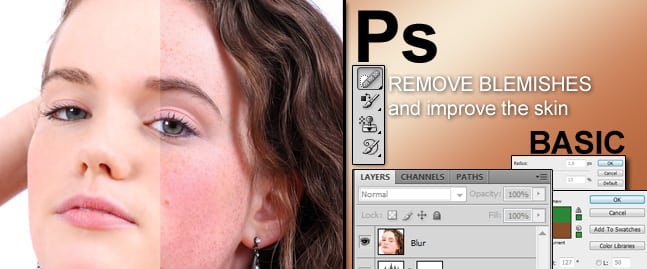
 In this tutorial we are going to use The Spot Healing Brush to removing blemishes. We can greatly improve a portrait by removing skin imperfections which are rarely a desirable feature in a photograph. In this tutorial we are going to use The Spot Healing Brush to removing blemishes. We can greatly improve a portrait by removing skin imperfections which are rarely a desirable feature in a photograph. |
| In previous versions of Photoshop, you could use the Clone Stamp tool or the Patch tool for this task. Photoshop CS introduced the Healing Brush, which is even better for repairing certain skin imperfections. The Spot Healing Brush can be found in the fourth row on the toolbar, and looks like a plaster. The Spot Healing Brush is now the simplest tool to use for removing blemishes. The key to using the Spot Healing Brush is to choose a brush size that is just slightly larger than the blemish and to work in stages on separate layers. |
Roll Over Image

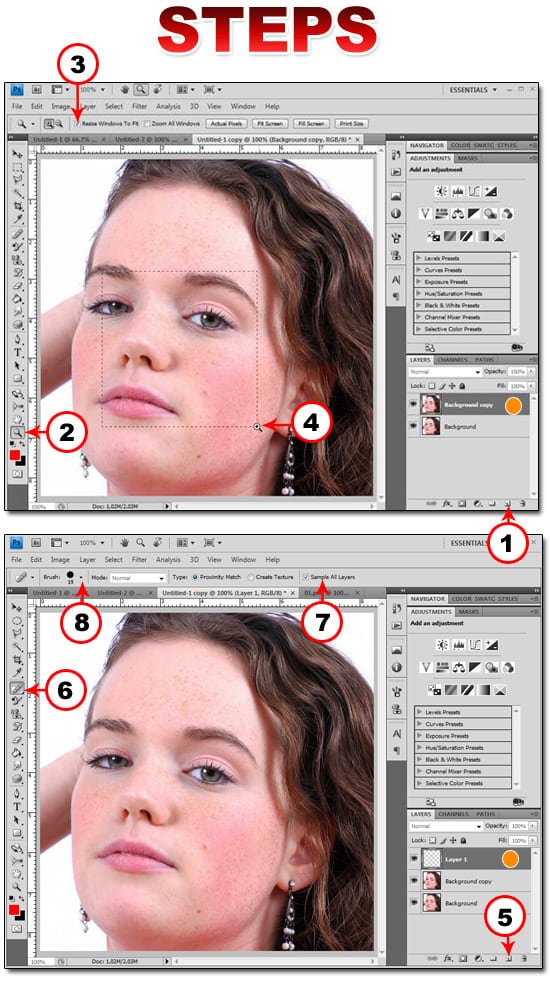
 With the image open, drag the Background layer over the New Layer icon to duplicate it.
 A Background copy layer is added, but the screen does not change.
 Click the Zoom tool.
 Click Resize Windows To Fit.
 Click and drag over the blemish areas to zoom in.The image is enlarged and fills the screen.
 Click the New Layer icon to add a new blank layer.
 A new layer is added in the Layers palette, but the screen does not change.
 Click the Spot Healing Brush.
 Click Sample All Layers.
 Click here to open the Brush Picker.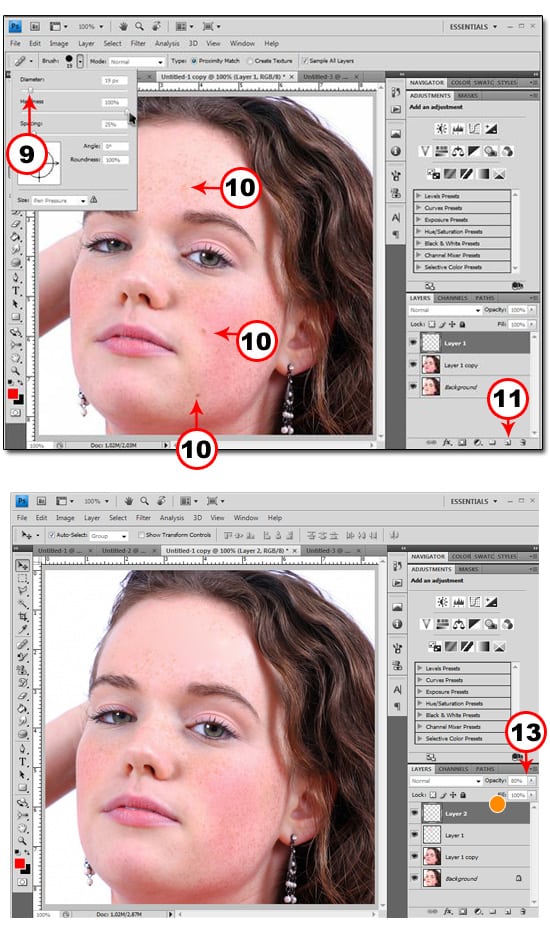
 Click and drag the Diameter slider to adjust the brush size.Note: The brush size should be just larger than the blemish that you want to remove.
 Click each of the worst blemishes of a similar size first.Photoshop removes the blemishes and blends the surrounding skin area.
 Click the New Layer icon to add another blank layer.
 Repeat steps 8 to 10, clicking the other blemishes.Layer 2 should be highlighted in the Layers palette.
 Click here and drag the Opacity slider for Layer 2 to the left until the skin looks natural.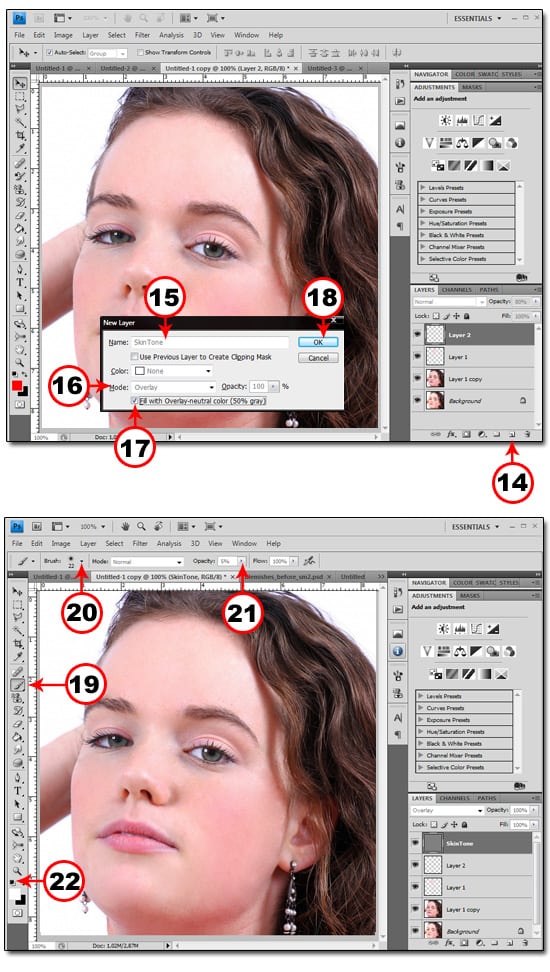
 Press the ALT key and click the New Layer icon.The New Layer dialog box appears.
 Type a name such as Skin Tone in the Name field.
 Click here and select Overlay for the mode.
 Click Fill with Overlay-Neutral Color (50% Gray).
 Click OK.A gray layer in Overlay mode appears in the Layers palette.
 Click the Brush tool.
 Click here and select a small soft-edged brush.
 Click here and reduce the brush opacity to about 5%.
 Click here to reset the default colors to black and white.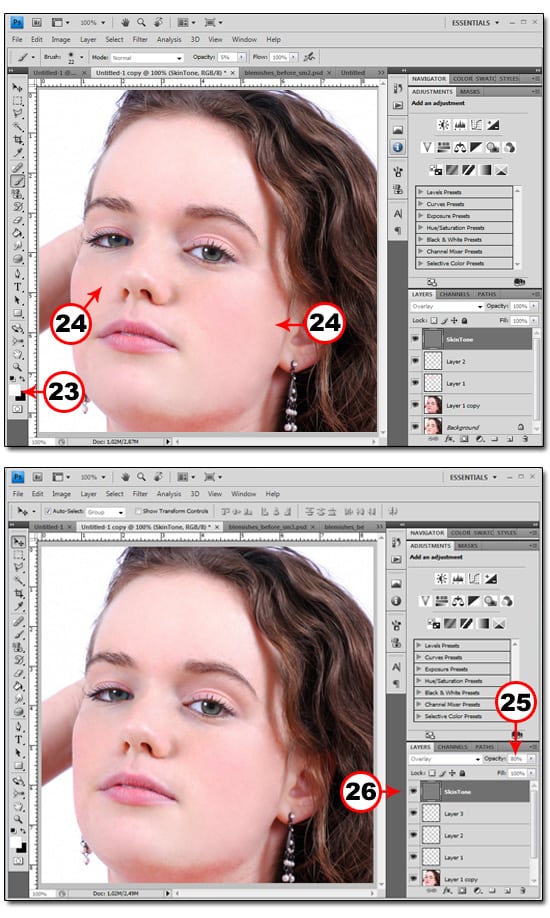
 Click here to reverse the colors, making white the foreground color.
 Paint over any dark spots in the image to smooth the skin.The skin tone appears smoother. Continue painting over any dark areas, adjusting the size of the brush tool as necessary.
 Click here and drag the Layer Opacity slider to the left to reduce the effect for a more natural look.
 Click the Visibility icon for the gray layer off and on to compare the image before and after the adjustment.The skin tone is smoothed and appears natural rather than over-corrected.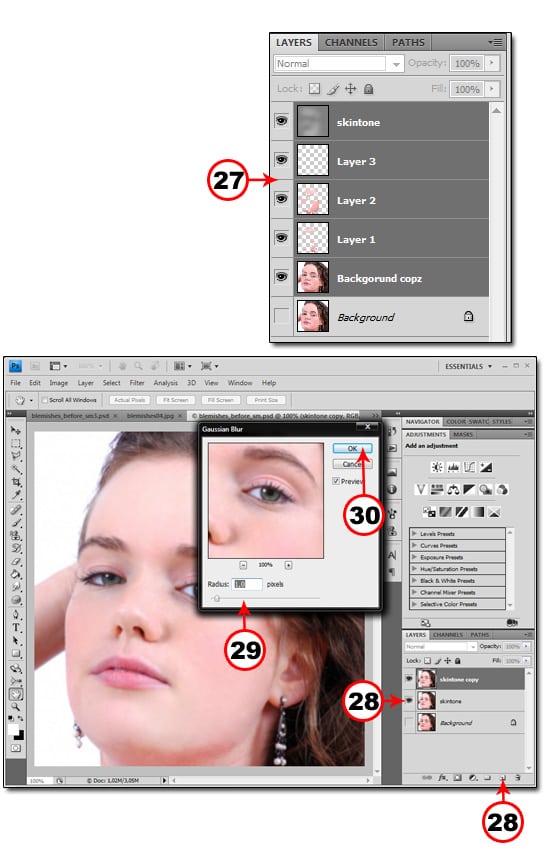
 Select all the layers except the original layer by holding down The Shift Key and clicking on all the layers, than go to Layers Merge Visibles or hit CTRL-E.
 Now click and drag the Merged layers to the Create New Layer button to make a copy of the layer.
 Select the copied layer and go to Filter-Blur-Gaussian Blur enter 1 pixel for the radius.
 Click OK.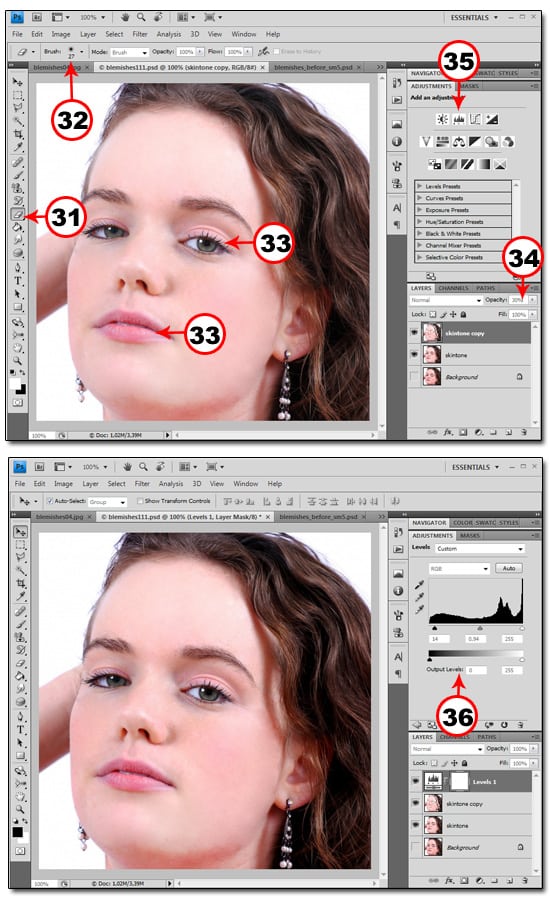
 Select the Eraser Tool.
 In the brush option select a soft edge brush.
 Start erasing the important areas of the images so the viewer’s attention is drawn to the spots.
 Lower the opacity to 30% now the image looks more natural.
 Click the Levels Button.
 Play with the settings until you get the desired result.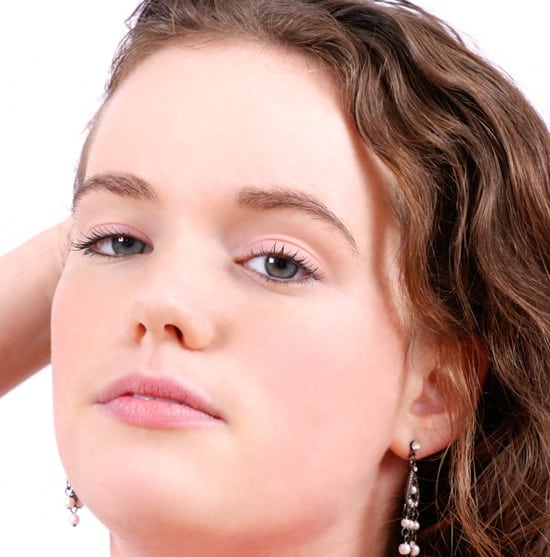
| That’s it guys for this tutorial try experimenting with the settings and see what works best with your images. |
| Please leave your comments for anything related to this tutorial. |


